Monday, June 4, 2012

Modified Micro-Silica Concrete Overlay

I had the great opportunity to manage the overlay of a 150,000 square yard roadway deck.  We used modified micro-silica concrete.  Managing this work provided good experience to install a quality product with tight parameters, and of course on a tight schedule, as always.  

The micro-silica is a great product because it acts as a pozzolanic or cementitious material when it reacts with cement.  The surface area of the concrete you place the micro-silica on must be wetted for 6 hours prior to placing the concrete.  The surface temperature of the existing concrete must be between 45 to 75 degrees when placing the micro-silica. 

The slurry from the mix must be brushed on prior to placing the micro silica 


Once the micro-silica is placed you have about 25 minutes to tine and cover the concrete with wet burlap.  The micro-silica in the concrete wants to suck up all the water it can, the more wet you keep it, the  better.   


Here is a photo of a portion of the finished product

Friday, February 10, 2012

Management of Box Girder Bridge

I had the great opportunity to manage the construction of a Box Girder Bridge.   Due to a late design, we were put on a tight schedule to complete this work.  It was a great opportunity to test my ability to lead and solve problems on a tight 6 month schedule.    


We had to tie all the rebar in the bottom deck, web walls and cap beams, prior to placing any concrete in the structure due to all rebar tying into the bottom deck.  Here are some pictures of the rebar going in.  


This was our first bottom deck concrete pour. 


Here is a view taken from the other structure we built.  This shows the box girder structure with all concrete placed except the top deck.  


Here is the structure with the top deck rebar tied, getting ready to place concrete.  


Here is our first top deck concrete pour.  As you can see the structure starts out small and widens as it goes west.  


This is the bridge with all the concrete complete and traffic on top.  Bridge drains, and the road underneath still need to go in.  


Thursday, February 9, 2012

The Autism Center

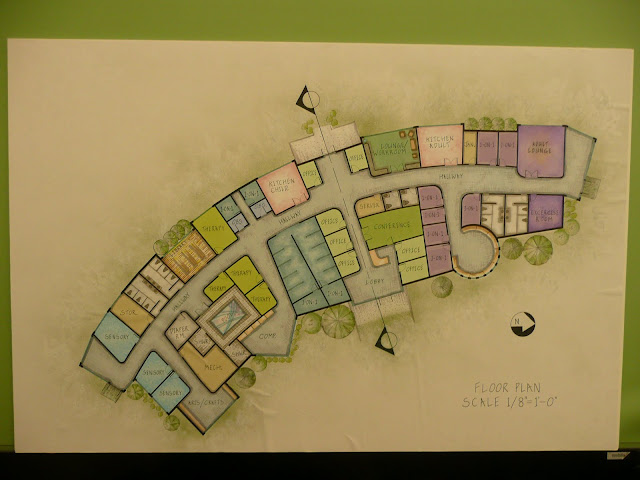
This is an Autism Center I designed.  Below is a video I created that shows just a small vision behind the concept of the Autism Center. This video would be shown to investors and future clients to inspire them to invest in the potential project.

The design of this Autism Center was done by a team of three, Shaun Johnson, Saul Hansen and Scott Griffiths. The video and computer renderings were done by me, Shaun Johnson.  A special thanks to a special family who helped inspire this idea.


Here are some computer renderings of the Autism Center I generated


This design of this reception center was done by me. The puzzle pieces come from the original concept of the building (see photo at the bottom of post).  The puzzle piece in the middle is the symbol of Autism, representing the child with autism.  The puzzle piece on the left symbolises the parents of a child with Autism.  The puzzle piece on the right represents a care giver at an autism center.  with all three pieces of the puzzle, a child with autism can learn adaptive self help skills to be successful in the world.   


Here are some pictures of a physical model made of the Autism Center (Created by Shaun Johnson, and Scott Griffiths). 


The site plan and floor plan were drawn on AutoCad by Shaun Johnson and colored with hand by Saul Hansen. 


The elevation was drawn and colored by Saul Hansen. The 3D views were drawn by Shaun and Scott, colored by Saul.


This is the concept board


Friday, August 13, 2010

King Family Remodel

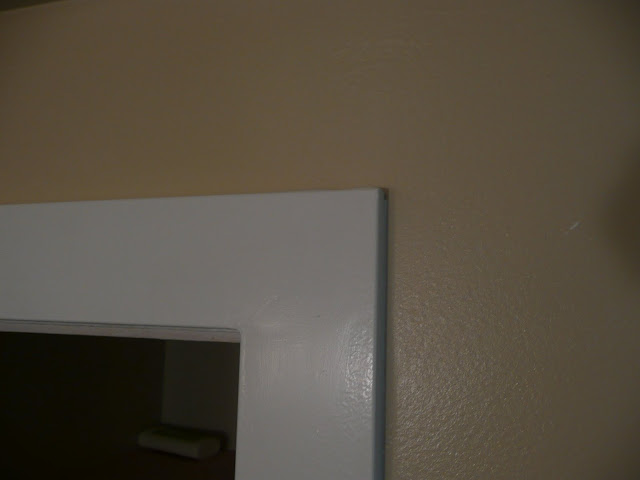
This is a remodel I did in the summer of 2009. Completely renovated 2 bathrooms, new windows, bath tubs, toilets, vanities, flooring, trim and paint. The entire house received new trim, paint and carpet. Pay attention to the detail on the trim and tile. The mitered edges on the doors are solid, you can't see the joint. The corner tile edges are also mitered verses the bland factory cut finish. This was a very successful project.


Downstairs bathroom before


Downstairs bathroom after


Upstairs bathroom before


Upstairs bathroom after


Mitered tile edges

Trim Finishes


Tuesday, April 28, 2009

Patio Cover


Patio cover that was built off an existing house.


Before Pictures


The Project


The Finished Product with a little snow on the Metal Roof